If you are a security professional or a web developer, chances are you have come across Burp Suite – a powerful web security testing tool used to identify and fix vulnerabilities in web applications. One of the essential steps to use Burp Suite effectively is to configure your browser to trust its CA certificate. This enables Burp Suite to intercept and analyze encrypted HTTPS traffic effectively. In this guide, we’ll walk you through the process of installing Burp’s CA certificate in Firefox.
Note: To be able to follow the steps below, you will need to Configure Firefox to work with Burp Suite or use extensions on Firefox, such as FoxyProxy, and have that ready.
Step 1: Downloading the CA Certificate
The first step is to download Burp’s CA certificate from the Burp Suite application. Follow these steps:
Solution 1:
- Open Burp Suite and navigate to the “Proxy” tab.
- Click on the “Proxy settings” sub-tab.
- Under the “Proxy Listeners” section, select the listener you want to configure Firefox for.
- Click on the “Import/export CA certificate” button and Export the certificate in DER format.
- Click “Next”, choose a directory where you want to save the file, name it (don’t forget to add .der as an extension), and click “Next” again to complete the process.

Solution 2:
- Open your Firefox web browser.
- Start proxying the traffic through your Burp Suite.
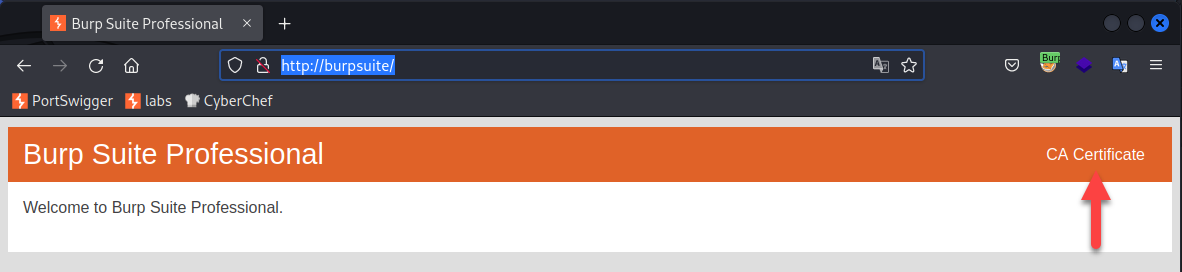
- In your browser, go to:
http://burpsuiteorhttp://burpsuite/cert(skips step 4). - On the top right-hand side, click on CA Certificate.
- Save the certificate as a DER file.

Step 2: Launch Firefox
If you haven’t already, open the Firefox browser on your machine.
Step 3: Access Firefox Settings
Next, click on the three horizontal lines (hamburger icon) in the top-right corner of the Firefox window to open the menu. From the dropdown menu, select “Settings” if you are on Linux/Ubuntu, “Preferences” if you are on a Mac, or “Options” if you are on Windows.

Step 4: Navigate to the Certificates Section
In the Settings/Preferences/Options window, select “Privacy & Security” from the left-hand sidebar. Scroll down until you find the “Certificates” section.
Step 5: Click on “View Certificates”
Under the “Certificates” section, click on the “View Certificates” button. This will open the Certificate Manager window.

Step 6: Import the CA Certificate
In the Certificate Manager window, select the “Authorities” tab. This tab contains all the Certificate Authorities trusted by Firefox.
Click on the “Import” button, locate the Burp’s CA certificate file (the one you exported in Step 1), and click “Open” to import it.
Firefox will then prompt you to choose which trust settings to apply to this certificate. Make sure to check the “Trust this CA to identify websites” option and click “OK” to complete the import process.

Step 7: Verify the Certificate Installation
To verify that Burp’s CA certificate is installed correctly, return to the Burp Suite application, make sure the Proxy Listener is running, and visit any HTTPS website in Firefox. Burp Suite should now intercept the traffic, and you will see the intercepted requests and responses in the Proxy Intercept tab.


Conclusion
Congratulations! You have successfully installed Burp’s CA certificate in Firefox. With this configuration, you can now use Burp Suite to analyze and manipulate encrypted HTTPS traffic effectively. Remember to exercise caution when using tools like Burp Suite and ensure that you are complying with ethical standards and legal regulations.
Thank you for reading, and happy testing!
Leave a Reply
You must be logged in to post a comment.